
Want to unleash your creativity with Python? In this tutorial, we’ll build a simple yet powerful drawing app using Python and Tkinter. This interactive application lets you draw freely, change brush colors, adjust brush size, and clear the canvas—perfect for beginners exploring GUI development and creative coding! 🚀
By the end of this tutorial, you’ll have a fully functional drawing application that you can customize and expand with more features. Let’s dive in! 🔥
What You’ll Learn
✔ How to create a drawing canvas with Tkinter 🖥️
✔ Handling mouse events for smooth brush strokes ✏️
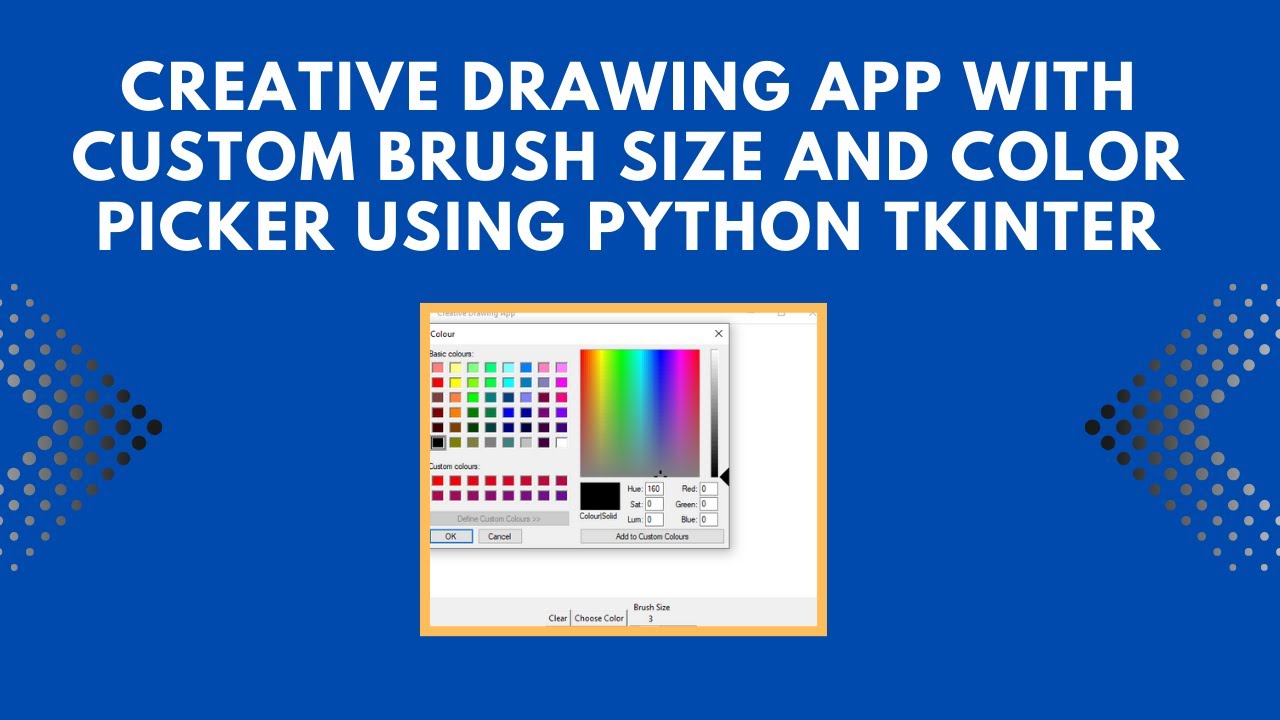
✔ Implementing a color picker to select brush colors 🎨
✔ Adding a brush size slider for customization 🛠️
✔ Creating a “Clear” button to reset the drawing board 🧹
Step 1: Import Required Modules
We’ll use tkinter for the GUI components and colorchooser to allow users to select brush colors.
import tkinter as tk
from tkinter import colorchooser
Step 2: Create the Drawing Application Class
We’ll define a DrawingApp class to manage the canvas, tools, and user interactions.
class DrawingApp:
    def __init__(self, root):
        self.root = root
        self.root.title("Creative Drawing App")

        # Create a canvas for drawing
        self.canvas = tk.Canvas(root, bg="white", width=600, height=400)
        self.canvas.pack()

        # Default brush settings
        self.color = "black"
        self.brush_size = 3

        # Bind mouse movement to the drawing function
        self.canvas.bind("<B1-Motion>", self.paint)

        # Create control panel for buttons and sliders
        self.controls_frame = tk.Frame(root)
        self.controls_frame.pack()

        # Button to clear the canvas
        self.clear_button = tk.Button(self.controls_frame, text="Clear", command=self.clear_canvas)
        self.clear_button.pack(side=tk.LEFT)

        # Button to choose brush color
        self.color_button = tk.Button(self.controls_frame, text="Choose Color", command=self.choose_color)
        self.color_button.pack(side=tk.LEFT)

        # Brush size slider
        self.size_slider = tk.Scale(self.controls_frame, from_=1, to=10, orient=tk.HORIZONTAL, label="Brush Size", command=self.change_brush_size)
        self.size_slider.set(self.brush_size)
        self.size_slider.pack(side=tk.LEFT)
Step 3: Implement the Drawing Functions
1️⃣ Handle Mouse Drawing
The paint() function tracks the mouse movement and draws circles to simulate brush strokes.
def paint(self, event):
    x1, y1 = (event.x - self.brush_size), (event.y - self.brush_size)
    x2, y2 = (event.x + self.brush_size), (event.y + self.brush_size)
    self.canvas.create_oval(x1, y1, x2, y2, fill=self.color, outline=self.color)
2️⃣ Clear the Canvas
This function erases all drawings and resets the canvas.
def clear_canvas(self):
    self.canvas.delete("all")
3️⃣ Select a Brush Color
Using colorchooser.askcolor(), users can pick any color for their brush.
def choose_color(self):
    self.color = colorchooser.askcolor(color=self.color)[1]
4️⃣ Adjust Brush Size
A slider allows users to change the brush size dynamically.
def change_brush_size(self, size):
    self.brush_size = int(size)
Step 4: Initialize and Run the App
We create the Tkinter window, instantiate the DrawingApp class, and run the main event loop.
if __name__ == "__main__":
    root = tk.Tk()
    app = DrawingApp(root)
    root.mainloop()
How It Works 🎨
✔ Click and drag the mouse to draw on the canvas.
✔ Change brush color using the “Choose Color” button.
✔ Adjust brush size using the slider.
✔ Clear the canvas with the “Clear” button.
Final Output: Interactive Drawing App
When you run the script, you’ll get a fully functional drawing board with:
🖥 A white canvas to draw on
🎨 A color picker to change brush colors
🛠 A brush size slider for customization
🧹 A clear button to erase drawings
Watch the Full Tutorial
For a step-by-step video guide, check out the YouTube tutorial:
Download the Full Code
Access the complete source code on GitHub:
Conclusion
In this tutorial, we built a fun and interactive drawing app using Python and Tkinter. This project is a great introduction to GUI development and event handling in Python! 🚀
💡 Next Steps:
✔ Add eraser functionality 🧼
✔ Save drawings as image files 📸
✔ Introduce custom brush shapes 🎭
Did you enjoy this tutorial?
💡 Like this post
💬 Share your thoughts in the comments
🔔 Subscribe for more Python projects!
🚀 Happy Coding! 🖌️✨