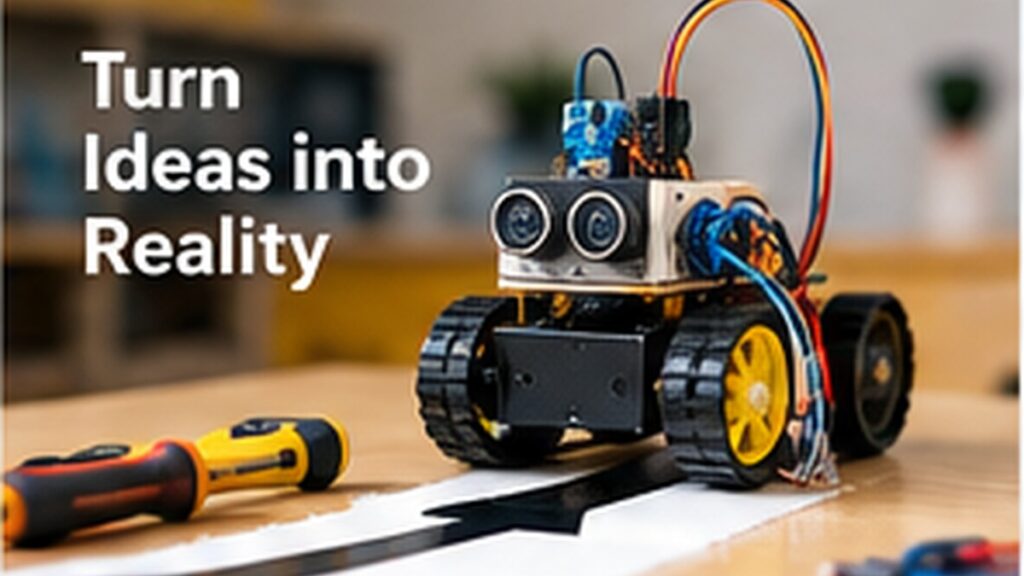
A line-following robot is one of the best introductory robotics projects because it combines sensing, programming, motor control and calibration in a model that provides immediate visual feedback.
This guide is written for students, parents and teachers who want practical, realistic information rather than a list of buzzwords. Use it as a starting point, adapt it to the student’s age and interests, and focus on completing small projects properly instead of trying to do everything at once.
How the robot works
The robot uses infrared sensor modules facing the floor. The sensors respond differently to a dark line and a light background. An Arduino reads the left and right sensor values and controls two motors through a motor-driver module.
If the robot begins drifting away from the line, the program changes the relative motor speeds or stops one motor briefly so the robot steers back.
- IR sensors detect the path
- Arduino makes the decision
- motor driver supplies motor current
- left and right motors create steering
Components required
Exact parts can vary, but a common beginner build uses the following components.
- Arduino Uno or Nano
- 2-channel IR line sensor or two IR modules
- L298N/L293D/TB6612 motor driver
- 2 geared DC motors
- 2 wheels plus caster wheel
- robot chassis
- battery pack
- switch
- jumper wires
Mechanical assembly
Mount the two motors symmetrically so the robot travels straight when both motors receive the same command. Position the IR sensors near the front and close enough to the floor to read the line consistently.
Keep the battery low and centred if possible. Loose wiring near the wheels is a common cause of failures.
Electrical connections
Connect each sensor output to a digital Arduino input. Connect motor-driver logic pins to Arduino outputs. Motors connect to the driver, not directly to the Arduino.
Make sure the Arduino and motor driver share a common ground. Use a battery appropriate for the motors and driver.
- Sensor left → Arduino input
- Sensor right → Arduino input
- Arduino outputs → motor-driver inputs
- motor-driver outputs → motors
- common ground between control and motor circuits
Basic control logic
Sensor modules may report HIGH or LOW differently, so test your modules before assuming which value means black. Once confirmed, the logic can be kept simple.
// Pseudocode
if (left_on_line && right_on_line) {
  move_forward();
} else if (left_on_line) {
  turn_left();
} else if (right_on_line) {
  turn_right();
} else {
  search_for_line();
}
Calibrating the robot
A robot that works on one surface may fail on another because sensor height, lighting, line width and reflectivity change. Calibration is part of the project, not an optional final step.
Start with slow motor speed. Make small adjustments and test on the complete track.
- Adjust sensor height
- adjust sensor potentiometers if available
- reduce speed for sharp turns
- make the line wide enough for the sensor spacing
- shield sensors from strong ambient light if needed
Troubleshooting
If the robot spins instead of moving forward, one motor may be wired in reverse. If it ignores the line, test the raw sensor values. If it oscillates rapidly, lower speed or use smoother steering.
Build sequence
- Assemble the chassis and verify both wheels rotate freely.
- Connect the motor driver and test forward, reverse, left and right without sensors.
- Connect the IR sensors and print/read their values on black and white surfaces.
- Write the basic line-following decision logic.
- Test on a simple straight line.
- Add gentle curves, then sharper turns.
- Tune speed and sensor spacing.
- Secure all wiring and prepare the project explanation.
Common mistakes to avoid
- Powering motors directly from Arduino pins
- Writing the full program before testing motors and sensors separately
- Assuming HIGH always means black
- Running too fast during initial calibration
- Using a track with inconsistent line width or reflective surfaces
Frequently asked questions
Why do line-following robots use IR sensors?
IR reflectance sensors can distinguish surfaces based on how much infrared light is reflected back, making them suitable for black-line/white-surface tracks.
Can I build it without Arduino?
Yes, analog comparator circuits can be used, but a microcontroller makes it easier to change logic and extend the project.
How can I make the robot smoother?
Use PWM speed control and proportional or PID-style steering rather than only full left/full right corrections.
Can I add more sensors?
Yes. Three, five or more sensors give more information about the line position and can improve handling at curves and intersections.
Final thoughts
Do not judge the project only by whether the robot eventually follows the line. The real learning comes from separately testing sensors, motors and control logic, then tuning how those parts work together.
Madras Academy tip: keep a simple project notebook or digital portfolio with photos, diagrams, code links, test results and what you learned. A small project that you can explain confidently is far more valuable than a large project you do not understand.