
Are you looking for a fun and interactive project to enhance your web development skills? In this tutorial, we’ll guide you through the process of building a Sticky Notes App using HTML, CSS, and JavaScript. This app allows users to add, edit, and delete sticky notes, and all the data is saved in local storage to ensure persistence even after the page reloads. Whether you’re building a task tracker, a to-do list, or just want a fun note-taking app, this project is a great way to practice your front-end skills!
What You’ll Learn:
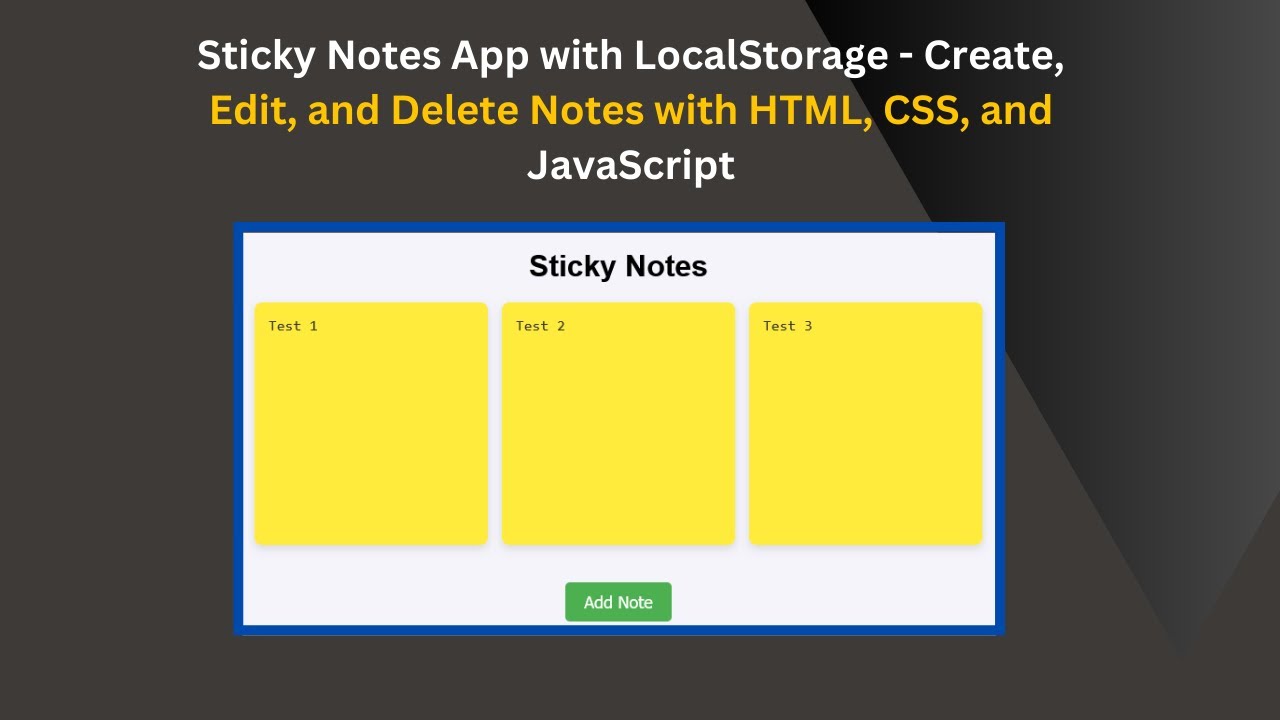
- Building the Sticky Notes App with HTML: Learn how to structure your notes and create a user interface with basic HTML elements. 📝
- Styling Notes with CSS: Discover how to create clean and modern designs for your notes, including hover effects and transitions for a better user experience. 🎨
- Storing Data with Local Storage: Learn how to use local storage to store notes so that they persist even after page reloads. 💾
- Adding Functionality to Edit and Delete Notes: Implement JavaScript functionality to allow users to add, edit, and delete sticky notes easily. ✏️
- Enhancing User Experience: Improve the overall user experience by adding smooth animations and transitions when interacting with sticky notes. 🌟
Key Features of the App:
- Add Notes: Users can click a button to add new sticky notes to the screen.
- Edit Notes: Notes can be updated in real-time using a text area.
- Delete Notes: Each sticky note has a delete button to remove it.
- Persistence with Local Storage: All notes are saved in the browser’s local storage, so they remain available after page reloads.
Let’s Walk Through the Code:
1. HTML Structure:
The app consists of a container to hold the sticky notes, with an “Add Note” button that triggers the addition of a new note.
<div class="container" id="notesContainer"></div>
<button class="add-btn" id="addNoteBtn">Add Note</button>
2. CSS Styling:
The notes are styled with a vibrant yellow color, giving them the classic sticky note look. We also added hover effects for a more interactive design.
.note {
    background-color: #ffeb3b;
    padding: 15px;
    border-radius: 8px;
    box-shadow: 0 4px 8px rgba(0, 0, 0, 0.1);
    width: 250px;
    position: relative;
    cursor: pointer;
    transition: transform 0.3s ease;
}
3. JavaScript Functionality:
We use JavaScript to manage the sticky notes. The key functions include:
- renderNotes(): Displays all notes from local storage.
- addNote(): Adds a new note to the list and saves it to local storage.
- updateNoteContent(): Updates a note’s content as the user types.
- deleteNote(): Deletes a note from the list and updates local storage.
let notes = JSON.parse(localStorage.getItem('notes')) || [];

function renderNotes() {
    const container = document.getElementById('notesContainer');
    container.innerHTML = '';
    notes.forEach((note, index) => {
        const noteDiv = document.createElement('div');
        noteDiv.classList.add('note');
        noteDiv.innerHTML = `
            <textarea oninput="updateNoteContent(event, ${index})">${note}</textarea>
            <button class="delete-btn" onclick="deleteNote(${index})">X</button>
        `;
        container.appendChild(noteDiv);
    });
}
4. Local Storage for Persistence:
Local storage ensures that notes are saved and persist even after the user refreshes the page.
localStorage.setItem('notes', JSON.stringify(notes));
Final Thoughts:
By the end of this tutorial, you’ll have created a fully functional Sticky Notes App that you can use as a task manager or note-taking tool. Plus, you’ll have a great understanding of how to use local storage in JavaScript to store data persistently.
Watch the Tutorial:
To see the full demo and get a detailed walkthrough of the code, check out the video here:
GitHub Repository:
You can access the complete source code on GitHub:
Sticky Notes App – GitHub Repository
If you enjoyed this tutorial, make sure to Like 👍, Share 🔄, and Subscribe 🔔 to Madras Academy for more exciting web development tutorials and projects. Happy coding! 🚀