
Creating seamless and visually appealing page transitions can significantly enhance user experience on your website. In this tutorial, we will explore how to implement smooth page transitions using HTML, CSS, and JavaScript. We’ll include animated sliding effects, a gradient background, and a transition overlay to make the transitions feel polished and dynamic.
Why Use Page Transitions?
Page transitions create a more engaging and interactive browsing experience. Instead of abrupt page changes, animations can make navigation feel smooth and professional, reducing visual strain and improving flow.
What You’ll Learn:
✅ Setting up multiple pages with HTML 🖥️
✅ Creating smooth transition animations with CSS 🎨
✅ Using JavaScript to handle page switching and effects ⬇️
✅ Implementing a dynamic gradient background for extra flair 🌈
✅ Adding a transition overlay for seamless transitions 🌟
Step-by-Step Guide to Page Transitions
1. Setting Up the HTML Structure
We’ll create two pages with buttons to navigate between them. These pages will be placed inside <div> containers with unique IDs.
<!DOCTYPE html>
<html lang="en">
<head>
<meta charset="UTF-8">
<meta name="viewport" content="width=device-width, initial-scale=1.0">
<title>Page Transition Animations</title>
<link rel="stylesheet" href="styles.css">
</head>
<body>
<!-- Transition Overlay -->
<div id="transition"></div>
<!-- Page 1 -->
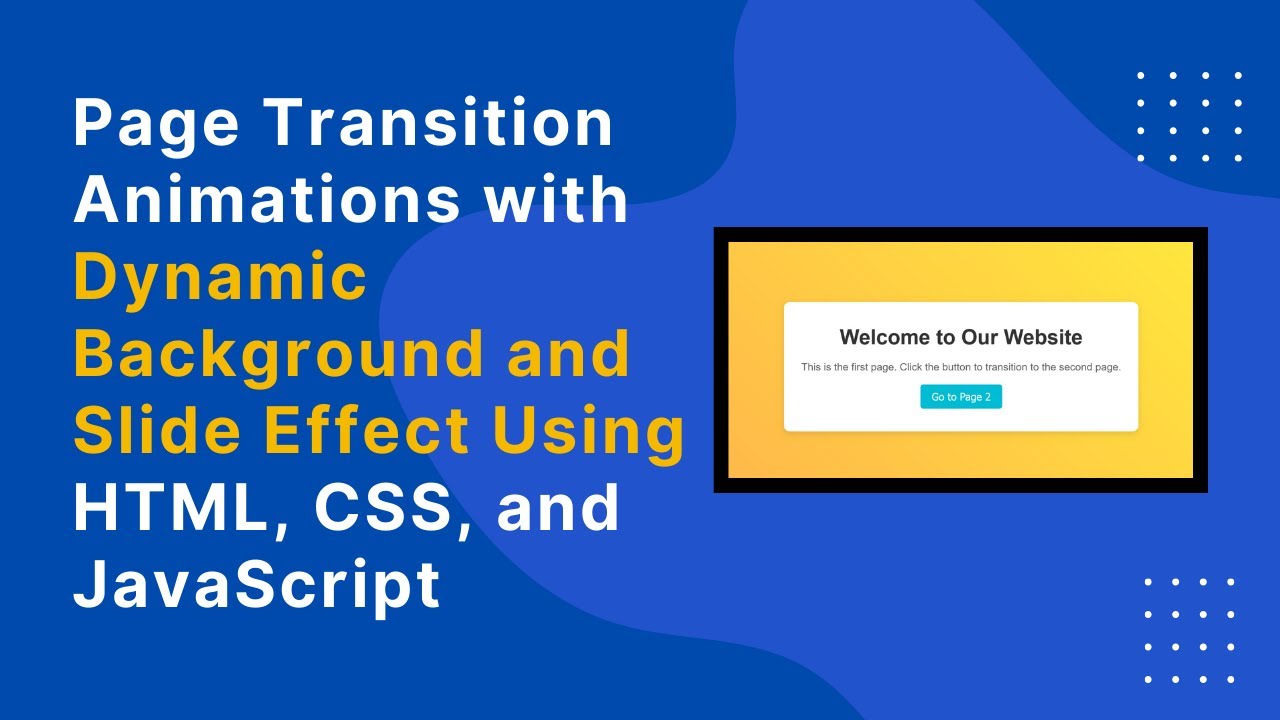
<div id="page1" class="page custom-background">
<div class="page-content slide-in">
<h1>Welcome to Our Website</h1>
<p>This is the first page. Click the button to transition to the second page.</p>
<button onclick="transitionPage('page1', 'page2')">Go to Page 2</button>
</div>
</div>
<!-- Page 2 -->
<div id="page2" class="page custom-background">
<div class="page-content slide-in">
<h1>About Us</h1>
<p>This is the second page. Click the button to return to the first page.</p>
<button onclick="transitionPage('page2', 'page1')">Go to Page 1</button>
</div>
</div>
<script src="script.js"></script>
</body>
</html>2. Adding CSS for Animations and Styling
We use CSS to create a gradient background animation and smooth transition effects.
/* Reset default styles */
body, html {
  margin: 0;
  padding: 0;
  height: 100%;
  font-family: Arial, sans-serif;
  background-color: #f5f5f5;
  overflow: hidden;
}

/* Page container */
.page {
  position: absolute;
  top: 0;
  left: 0;
  width: 100%;
  height: 100%;
  display: flex;
  justify-content: center;
  align-items: center;
  opacity: 0;
  pointer-events: none;
  transition: opacity 1s ease-in-out;
}

/* Slide animation */
@keyframes slideIn {
  0% { transform: translateX(100%); }
  100% { transform: translateX(0); }
}

.slide-in {
  animation: slideIn 1s ease-in-out;
}

/* Gradient background animation */
.custom-background {
  background-image: linear-gradient(45deg, #ff6f61, #ffeb3b, #4caf50);
  background-size: 400% 400%;
  animation: gradientAnimation 5s ease infinite;
}

@keyframes gradientAnimation {
  0% { background-position: 0 0; }
  50% { background-position: 100% 100%; }
  100% { background-position: 0 0; }
}
3. Using JavaScript for Page Transitions
JavaScript is used to handle the page switching and apply transition effects.
// Function to handle page transitions
function transitionPage(currentPage, nextPage) {
  document.getElementById(currentPage).style.opacity = '0';
  document.getElementById('transition').style.opacity = '1';

  setTimeout(function() {
    document.getElementById(currentPage).style.display = 'none';
    document.getElementById(nextPage).style.display = 'flex';
    document.getElementById(nextPage).style.opacity = '1';

    setTimeout(function() {
      document.getElementById('transition').style.opacity = '0';
    }, 500);
  }, 500);
}

// Show page 1 on load
window.onload = function() {
  document.getElementById('page1').style.display = 'flex';
  document.getElementById('page1').style.opacity = '1';
};
Watch the Video Tutorial
For a step-by-step walkthrough, watch the video tutorial:
Get the Full Source Code
Access the complete source code on GitHub:
GitHub Repository
Final Thoughts
By following this tutorial, you now have a simple yet elegant page transition animation that enhances user experience. These smooth transitions make navigation feel seamless, making your website look more professional.
Feel free to customize the animations, colors, and effects to match your website’s design. If you found this tutorial helpful, don’t forget to like, share, and comment! 🚀
Stay tuned for more web development tips and tutorials! 🎨💡