Moisture Controlled Water Pump Using Soil Sensor and Arduino
Welcome to this hands-on tutorial by Madras Academy, where you'll build a Moisture Controlled Water Pump System using an Arduino, a Soil Moisture Sensor, and a 5V Water Pump. This smart irrigation project automatically activates the water pump when the soil gets too dry—perfect for small gardens, indoor plants, or greenhouse setups. This project is ideal for students, gardeners, and DIY enthusiasts who want to explore the basics of sensor-based automation and smart farming concepts.
👉 Use the tabs below to project:
- Project Info & Demo: See the final build in action.
- Wiring & Code: Get the full schematic and Arduino code.
- Notebook & Help: A printable project sheet and troubleshooting guide.
Let’s automate your garden!
📌 Project Information
- Title: Moisture Controlled Water Pump
- Difficulty: Beginner
- Build Time: 20-30 minutes
- Skills Gained: Sensor interfacing, relay control, automation logic
🎬 Demo Video
See the project here:
🧰 Components List
Before diving into the wiring and code, let’s first review the essential components required for this project:
Essential components:
- Arduino Uno or Mega
- Soil Moisture Sensor
- 5V Relay Module
- 5V Mini Water Pump
- External Power Supply (Optional for Pump)
- Jumper Wires
- Breadboard
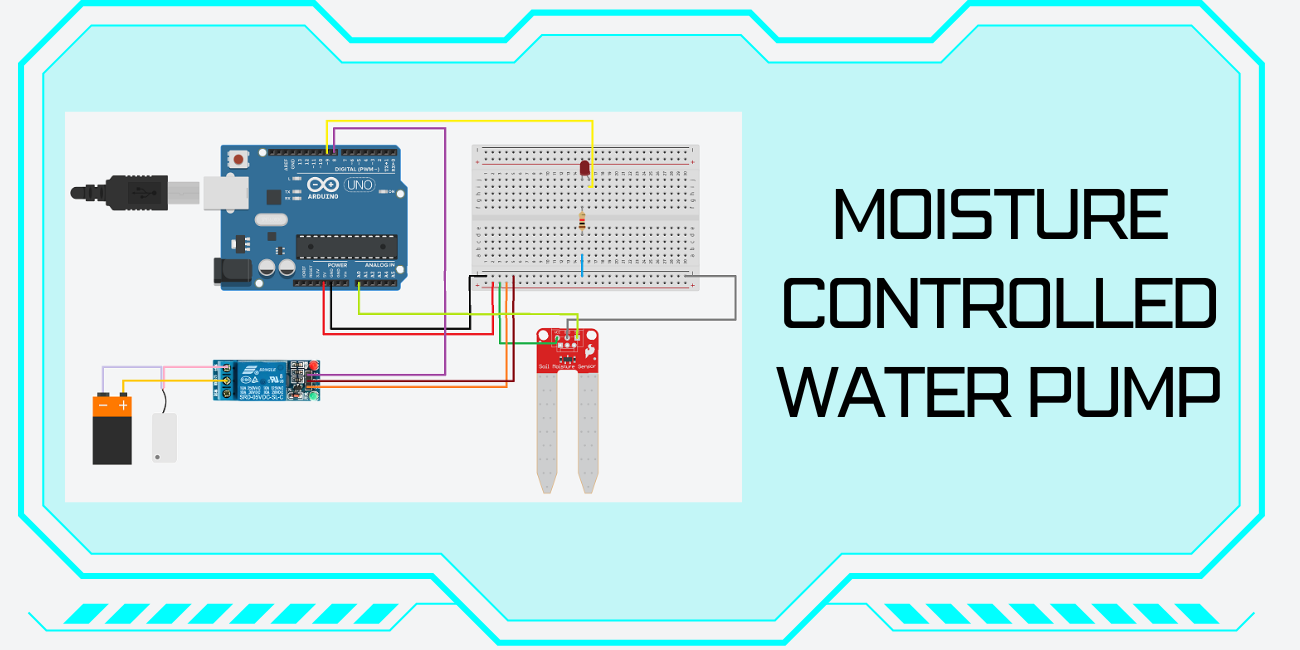
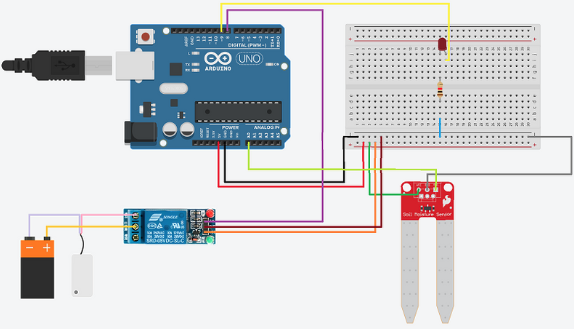
🔌 Circuit Diagram
Connect the DHT11 sensor to the Arduino Mega, ensuring the following connections:
📘 Project Notebook Template
Use this format to log your experiment:
- Project Name:
- Date Built:
- What Problem It Solves:
- Materials:
- Wiring Diagram:
- Soil Moisture Threshold:
- Outcome:
- Improvements for Future:
🛠 Troubleshooting Tips
- 💡 Pump not working? Double-check relay connections and ensure the pump has enough current.
- 💡 Sensor not detecting dry soil? Try adjusting the threshold value in the code.
- 💡 Power issues? Use external 5V power for the pump to avoid brownouts.
- Duration: 3 Days
- Total Lectures: 15
- Capacity: Max 50
- Difficulty Level: Advanced
- Medium of Instruction: English
Project Cost
₹1,500 ₹3,000